Automatic item transport system with the minecarts
I will introduce a high-speed item transport system using Minecarts with hopper.
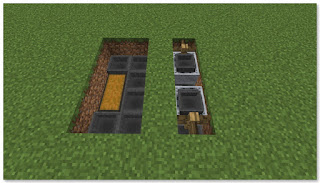
Minecart with hopper is installed on two hoppers.
This picture is a picture of the unloading station which has further speeded up. We set Minecart with hopper to 3, and we made four hoppers to suck out items.
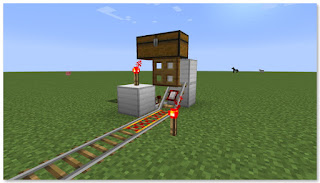
・Put a large chest.
・Install the hoppers. (The nozzle points toward the large chest)
・Place the fences on both ends of the opposite side of the large chest.
・Install the rails between the fences.
・Place the two Minecarts with hopper on the rails.
・Push the Minecart with hopper until it contacts the fence.
・If the position of Minecart with hopper is decided, break the rails.
・Fill the ground next to Minecart with hoppe.
・Place the block as the picture.
・Place the half block as a subscript on this side of the hole.
・Place the iron fence on the other side.
・Put blocks on the left and right.
・Attach the half block with a clearance on the iron fence.
・Put a chested Minecart with hopper on the rail.
・Push the Minecart with hopper until it hits the iron fence.

・Break one block and rails
・Install two blocks on Minecart with hopper
・Up to this point, it is the same as how to make a single-line unloading station.
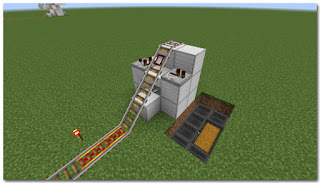
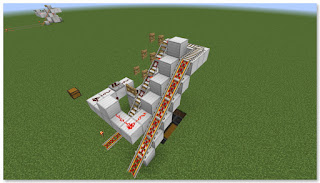
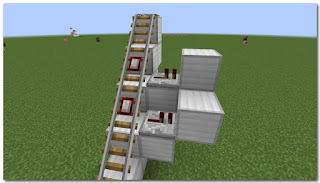
・Install powered rails, rails and detector rails.
・Install redstone repeater and redstone comparator next to oblique detector rail.
・Install a red stone torch next to the powered rail.
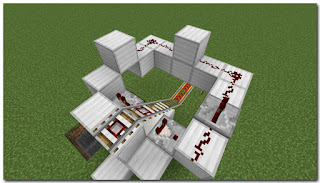
・Install redstone powder and redstone repeater.
・Install two redstone torches.
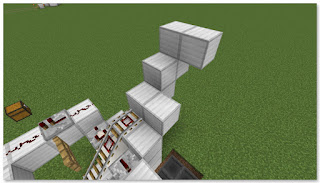
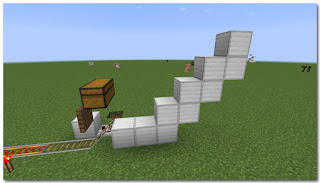
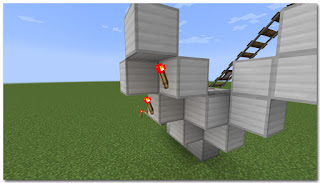
・Install blocks in a staircase pattern.
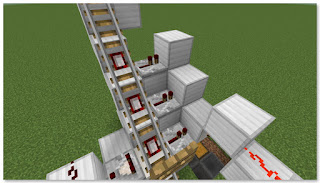
・Install detector rails and rails
(There are three detector rails)
・Install a redstone repeater next to each detector rail.
・Install a block at the tip of each redstone repeater.
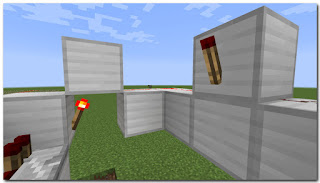
・Attach the red stone torch to the side of the block.
・Place each block on the redstone torch.
・Move to the rail side and attach the torch to the side of the block.
・Place each block on the redstone torch.
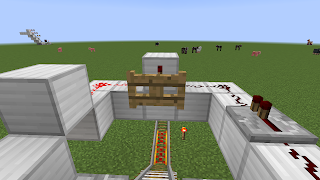
・Put the red stone torch on the side of the block. Place a fence gate next to each.
・Install the blocks in a staircase pattern.
・Install a powered rail on the stairs. Install the rails on the plane.
・Completion
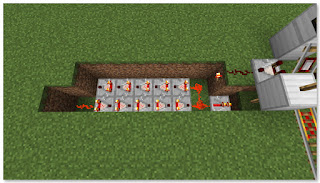
・Place the block, set up the rails, powered rails and red stone torch, detector rails.
・Remove the rightmost detector rail and place a stop block.
・In order of signals transmitted from the comparator, install red stone torch, red stone powder, red stone repeater, red stone torch, block, red stone torch.
・Arrange Redstone Comparators. (Note the direction).
・Redstone powder to the far left.
・Place the block on the detector rail, install a large chest on the top, and install a trap door (superscript) on the side.
・After installation, break the block.
・That's it.
(^o^)ノシ
Since loading and unloading items also uses Minecart with hopper, it does not take time.
(Java version of Minecraft 1.13)
Since I can not speak English, I used a Google translation.
Sorry if there is a weird translation.
Thank you very much.
(Java version of Minecraft 1.13)
Since I can not speak English, I used a Google translation.
Sorry if there is a weird translation.
Thank you very much.
High speed automatic conveying system using Minecarts with hopper
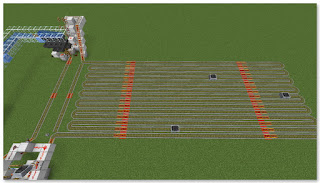
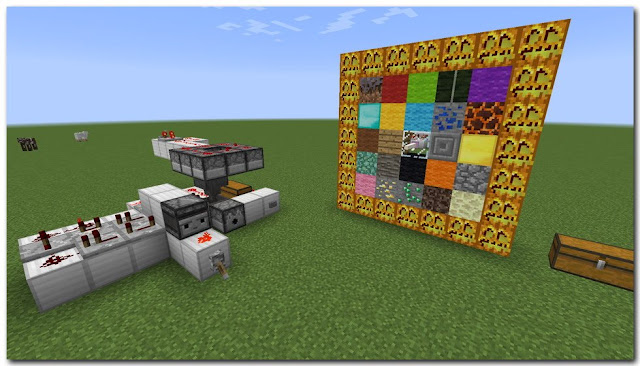
First of all, let me show you the big picture. The left is the unload station and the right is the load station.
There is a water channel on the other side of the railroad.
Since I was troublesome to return the item to the original, I also made a transportation system for items using water channel.
There is a water channel on the other side of the railroad.
Since I was troublesome to return the item to the original, I also made a transportation system for items using water channel.
A lot of rails can be seen in the lower part of the photo, but if the transport distance is short, a traffic jam will occur at the unloading station, causing a decline in performance. So, I increased the distance of the rail.
The maximum performance is about 330 meters (330 blocks). 1 chunk 16 blocks × 16 blocks, about 20 chunks .... In most cases it is outside the display distance range.
m (__) m
m (__) m
Unloading Station
The added function is Minecart with hopper standby place
Minecart with hopper arrives at unloading station at regular intervals, but depending on the quantity of items loaded, it may arrive early.
Also, even if the transport distance is short, as Minecart with hopper keeps entering the station, the processing capacity of the hopper disappears, the baggage can not be dropped, and Minecart with hopper is crowded. So I made three meeting places for Minecart with hopper.
Also, even if the transport distance is short, as Minecart with hopper keeps entering the station, the processing capacity of the hopper disappears, the baggage can not be dropped, and Minecart with hopper is crowded. So I made three meeting places for Minecart with hopper.
Add route to carry items to large chest
I installed Minecart with hopper under the transportation Minecart with hopper.Minecart with hopper is installed on two hoppers.
This picture is a picture of the unloading station which has further speeded up. We set Minecart with hopper to 3, and we made four hoppers to suck out items.
How to make a high-speed unloading station
・Dig into the ground. (4 × 4 × 2)・Put a large chest.
・Install the hoppers. (The nozzle points toward the large chest)
・Place the fences on both ends of the opposite side of the large chest.
・Install the rails between the fences.
・Place the two Minecarts with hopper on the rails.
・Push the Minecart with hopper until it contacts the fence.
・If the position of Minecart with hopper is decided, break the rails.
・Fill the ground next to Minecart with hoppe.
・Place the block as the picture.
・Place the half block as a subscript on this side of the hole.
・Place the iron fence on the other side.
・Put blocks on the left and right.
・Attach the half block with a clearance on the iron fence.
・Install the rails.

・Break one block and rails
・Install two blocks on Minecart with hopper
・Up to this point, it is the same as how to make a single-line unloading station.
・Install powered rails, rails and detector rails.
・Install redstone repeater and redstone comparator next to oblique detector rail.
・Install a red stone torch next to the powered rail.
・Install the blocks as shown in the picture.
・Install redstone powder and redstone repeater.
・Install two redstone torches.
・Install the fence gate.
・Install blocks in a staircase pattern.
・Install detector rails and rails
(There are three detector rails)
・Install a redstone repeater next to each detector rail.
・Install a block at the tip of each redstone repeater.
・Attach the red stone torch to the side of the block.
・Place each block on the redstone torch.
・Move to the rail side and attach the torch to the side of the block.
・Place each block on the redstone torch.
・Put the red stone torch on the side of the block. Place a fence gate next to each.
・Install the blocks in a staircase pattern.
・Completion
How to install Minecart with hopper using Stairs.
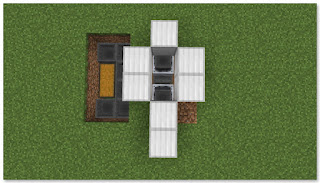
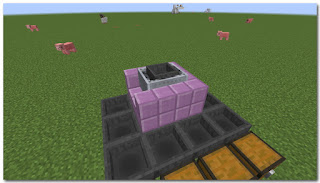
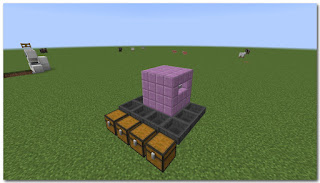
This unloading station fixed minecart with hopper using staircase block.
Minecart with hopper is located across 4 hoppers, so you can have 4 rows of transportation. (Installation space became smaller)
Installation method
Position the hoppers with the nozzle of the hopper facing the chest.
Arrange the four stairs so that you can dent in the middle.
The center of the indentation is the corner of the four hoppers.
(Items can be sucked out with four hoppers)The center of the indentation is the corner of the four hoppers.
However, if the indentation is a square (one block), it is difficult to install a truck with a hopper.
So, like a photo, I will make one groove.Install block and rail next to it, put Minecart with hoppe on it and drop it in the groove.
So, like a photo, I will make one groove.Install block and rail next to it, put Minecart with hoppe on it and drop it in the groove.
Picture with minecart with hopper. Please push from the back so that minecart with hopper will completely stick to the wall.
Let's set the stairs above. It is easy to put in place when setting the stairs after installing the appropriate block next to the installation.
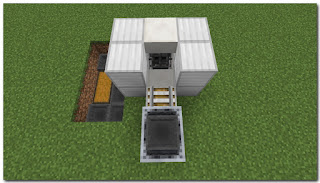
If you cover the truck with the hopper with the staircase block, it will look like this. (With peep window)
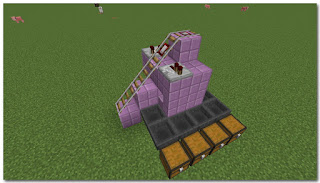
Picture with rails. After is the same procedure as described above. You can save some cost and space.
Actually ... I also thought about the hopper 8 row specification.
It is a combination technique of making white block station and purple station building method.The unloading station bottleneck is gone.
Using dropper 4, the item is emitting items to the waterway.
However, it seems that there is no use for over specs.
(;´∀`)
Item loading station
First, I will explain how to make an unloading station for a single line.
・Redstone powder to the far left.
・After installation, break the block.
・That's it.
Based on the single-track unloading station, make double-track unloading station.
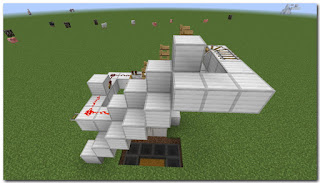
・Place the blocks in a stepwise manner.
(Stairs at the bottom is a note that the two blocks.)
(Stairs at the bottom is a note that the two blocks.)
・Place the rails and the detector rails.
・Install the block and redstone repeater next to each detector rail.
・Install a block next to each redstone repeater.
・Install a block next to each redstone repeater.
・Place the torch on the side of the installed block.
・Place the block on top of the torch.
・Place the block on top of the torch.
・Ride to the rail side and stand the redstone torch on the side of the installed block.
・Install a fence gate next to the redstone torch.
・Install a fence gate next to the redstone torch.
・Place the block next to the oblique rail and set up the torch.
・Connect the block and detector rail with red stone powder.
・Connect the block and detector rail with red stone powder.
・Place the block on top of the red stone torch.
・Place the red stone powder on top of the block, we set up a fence gate next to the red stone powder.
・Place the red stone powder on top of the block, we set up a fence gate next to the red stone powder.
・Install the block in a staircase pattern.
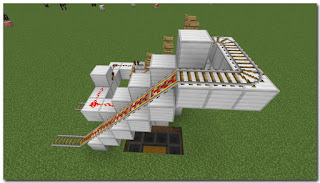
・Set up a powered rail on the stairs.
・Place the rail on a flat surface.
・It is completed through the above.
・Set up a powered rail on the stairs.
・Place the rail on a flat surface.
・It is completed through the above.
(^o^)ノシ




















Comments
Post a Comment